
A client says yes on Friday afternoon.
You're relieved. Then immediately stressed. Because now you have to send the contract, wait for it to be signed, create the invoice, send the invoice, wait for payment, send the welcome email, send the onboarding questionnaire, wait for them to fill it out, chase them when they don't, set up the project folder, create the Notion workspace, schedule the kickoff call, and brief yourself on everything they told you so you don't sound unprepared on Day 1.
That's 12 separate tasks before a single hour of actual client work happens.
Most solo founders spend 5-7 hours per client on exactly this setup process. Multiply by 10 clients a year and you've lost a full work week to admin that has nothing to do with the value you deliver.
The entire sequence — contract to signed, invoice to paid, welcome email sent, assets collected, kickoff scheduled — can run automatically the moment a client says yes. Not eventually. Within minutes of that "let's do it" email.
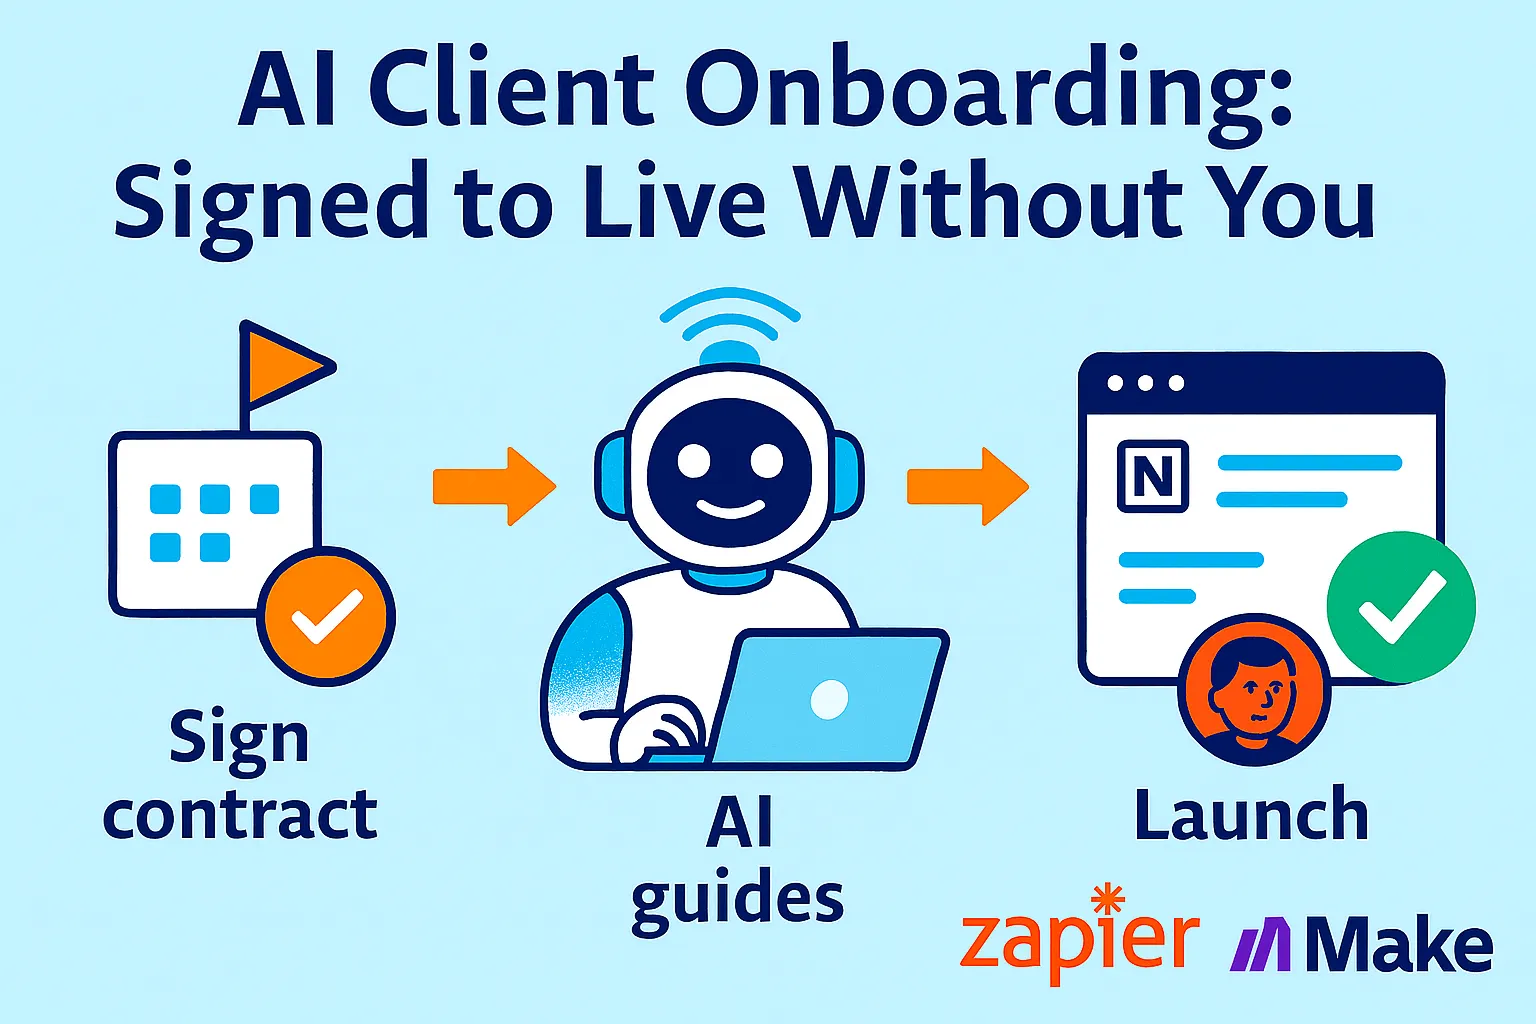
This guide builds a complete AI client onboarding system using tools that cost under $80/month combined. Once it's running, your involvement from signed contract to live project is one trigger and a kickoff call. Everything in between happens without you.
Why Manual Onboarding Breaks Solo Founders Specifically
With an agency or team, onboarding is someone's job. With you, it competes with everything else.
A client says yes on a Friday. You're in the middle of something. You send the contract Monday morning. They sign Wednesday. You invoice Thursday. They pay the following Monday. It's been 10 days and you still haven't sent a welcome email or collected their brand assets.
Meanwhile, their first impression of working with you is a slow, fragmented sequence of disconnected emails. The excitement from the sales conversation has cooled. They're wondering if they made the right call.
Automated onboarding fixes three things simultaneously:
Speed: Everything that can happen in minutes actually happens in minutes, not days. Contract goes out instantly. Invoice follows the signature. Welcome email lands before they close their laptop.
Consistency: Every client gets the same professional sequence regardless of your current workload. The tenth client gets the same quality onboarding as the first.
Completeness: Nothing falls through the cracks because you were busy with another client. The workflow runs whether or not you remembered to run it.
Automation can eliminate up to 80% of the time and effort typically required to onboard new clients. The remaining 20% — the kickoff call, the relationship, the actual work — is where your time should go.
The 5-Layer Onboarding System
Each layer is a separate workflow. Build them in order, because each one triggers the next.
Layer 1: Contract Trigger — "Yes" Starts Everything
The entire system starts with one event: contract signed.
This is your master trigger. Every subsequent workflow — invoice, welcome email, asset collection, status updates — traces back to this single moment.
The tool: PandaDoc (free tier) or DocuSign (free tier)
PandaDoc is better for solo founders because it combines proposal, contract, and payment link in one document. DocuSign is better if your clients are enterprise and expect DocuSign specifically.
What happens when the contract is signed:
Trigger: Contract signed in PandaDoc
(PandaDoc sends a webhook / Zapier integration fires)

Simultaneous actions (all run in parallel, not sequential):

Action 1 → Stripe
Create and send invoice for deposit amount
Set due date: today + 3 days
Add client name, project name, amount from contract fields

Action 2 → Notion
Create client workspace from template:
  /Clients/[Client Name]/
    ├── Brief & Goals
    ├── Assets (empty)
    ├── Deliverables
    ├── Meeting Notes
    └── Status Tracker

Action 3 → Gmail
Send contract confirmation email (AI-written, client-specific)

Action 4 → Google Drive
Create project folder from template:
  [Client Name] - [Project Type] - [Start Month]
    ├── 01_Brief
    ├── 02_Assets
    ├── 03_Drafts
    ├── 04_Final
    └── 05_Invoices
The contract confirmation email (AI-written):
AI Prompt for Zapier:
"Write a brief, warm email confirming that [Client Name] has signed
their contract for [Project Type].

Include:
- Confirmation that the contract is signed and saved
- That they'll receive an invoice shortly for the deposit
- One sentence expressing genuine excitement about the project
- A note that you'll send onboarding details within the hour

Tone: Professional but warm, like a founder who's excited to work
with them. Not corporate. Not over-formal.
Max 100 words. Sign as [Your Name]."
This email arrives in their inbox within 2 minutes of signature. Before most clients have even closed the DocuSign tab.
PandaDoc setup tip: Use template variables ({{client_name}}, {{project_type}}, {{start_date}}, {{deposit_amount}}) in your contract. Zapier can extract these and pass them to every downstream workflow. This is how the welcome email knows their project type and the Notion workspace is named correctly — automatically.
Layer 2: Payment Trigger — Invoice to Kickoff
Don't schedule the kickoff call until you have a paid deposit. This is a boundary that automation enforces better than you do manually.
What happens when deposit is paid:
Trigger: Stripe payment received (matching project invoice)

Action 1 → Gmail
Send welcome email (AI-written, see prompt below)

Action 2 → Calendly / Cal.com
Send kickoff call scheduling link
(Use Calendly event type "Client Kickoff — 60 min")

Action 3 → Notion
Update client status: "Awaiting Onboarding Info"

Action 4 → Typeform
Send onboarding questionnaire link
(Separate from welcome email — give them 1 email at a time)

Action 5 → Slack / Telegram (to yourself)
"💰 [Client Name] paid deposit. Onboarding sequence started."
The welcome email (AI-written, specific to project type):
AI Prompt:
"Write a welcome email for a new client who just paid their deposit.

Client: [Name]
Project: [Project Type from contract]
Start Date: [Date]
My name: [Your Name]
My business: [Business Name]

Include:
1. Genuine welcome — they're now officially a client
2. What happens next (they'll receive an onboarding form,
   kickoff call link is attached)
3. What to expect in the next 7 days (be specific based on
   [Project Type])
4. One sentence on what you need from them to start strong

Tone: Excited but professional. Like the best agency email
they've ever received. Max 150 words."
Why two separate emails (confirmation + welcome)?
The contract confirmation says "you're signed." The welcome email says "you're a client now, here's exactly what happens next." Separating them gives each message clarity and avoids one long email that covers too much.
Layer 3: Asset Collection — No More Chasing
The biggest onboarding time-drain for service businesses isn't the welcome email. It's chasing clients for the information and assets you need to start work.
"Can you send me your brand guidelines?" "Do you have the copy in a Google Doc or a Word file?" "What's the login for your website?" "Did you see my last email about the brand assets?"
This chase loop ends with one well-structured intake form sent automatically after payment.
The intake form structure (Typeform or Jotform):
Build one master intake form per service type. The form should collect everything you need to start work — no follow-up questions required.
Example: Web Design Client Intake Form

Section 1: Project Context
- Describe your business in 2-3 sentences
- Who is your target customer?
- What problem does your product/service solve for them?
- What outcome do you want from this project?

Section 2: Brand Assets
- Upload: Logo files (SVG/PNG preferred)
- Upload: Brand guidelines (if you have them)
- Brand colors (hex codes if known)
- Fonts you're using (or "I don't know, help me choose")
- 3 websites you love the look of [URL fields]
- 3 websites you hate the look of [URL fields]

Section 3: Content
- Upload: Any existing copy, product descriptions, bios
- Do you have professional photos? [Yes / No / Upload here]
- Do you have a domain? [Yes — what is it / No]

Section 4: Access
- Website platform (WordPress / Squarespace / Webflow / Other)
- Will you share login access? [Yes, I'll share via 1Password /
  Yes, I'll email / I need help with this]

Section 5: Logistics
- Preferred communication channel (Email / Slack / WhatsApp)
- Best times for quick questions (Morning / Afternoon / Either)
- Any hard deadline we should know about?
The chase-elimination workflow:
Trigger: Typeform sent (3 days ago) + not completed

Action 1: Check if form submitted
→ If YES: Continue to Layer 4
→ If NO: Send gentle reminder email

Reminder Email Prompt:
"Write a friendly 60-word reminder to [Client Name] that their
onboarding form is still waiting. Note that we can't start work
until we receive it. Keep it warm, not nagging. Include the form
link. Sign as [Your Name]."

Wait 48 more hours → If still not submitted →
Send final reminder flagged as [NEED YOUR INPUT] in subject line
Why Typeform over a Google Form:
Typeform has conditional logic (show the logo upload field only if they say they have a logo), looks professional (matches the quality impression your onboarding sequence builds), and integrates with Zapier natively. First impressions extend to every touchpoint.
The AI asset organizer:
Once the form is submitted, run a Make workflow:
Trigger: Typeform form submitted

Action 1: Extract all uploaded files from Typeform response
Action 2: Move files to correct subfolder in Google Drive
  (Logos → /02_Assets/Logos/, Copy → /02_Assets/Copy/, etc.)
Action 3: Create "Brief Summary" page in Notion
  AI Prompt: "Summarize this client intake form into a 200-word
  project brief. Include: client business description, project goal,
  key constraints, and 3 things to prioritize."
Action 4: Update Notion status: "Assets Received — Ready for Kickoff"
Action 5: Gmail — send confirmation to client
  "We've received everything we need. See you at kickoff."
After this step, your Notion workspace has a pre-written project brief, all assets are organized in Drive, and you're walking into the kickoff call already briefed. No review required.
Layer 4: Status Updates — Clients Informed Without Writing Emails
The most common solo founder complaint after projects start: clients don't know what's happening, so they email to ask, which interrupts your work.
The fix isn't better communication discipline — it's automating the updates so they go out without you writing them.
The weekly status update workflow:
Trigger: Every Friday 4:00 PM (for active clients only)

Step 1: Pull data from Notion
- Current project status
- Tasks completed this week (from Notion database)
- Next milestone and expected date
- Any blockers or decisions needed from client

Step 2: AI by Zapier
Prompt: "Write a brief Friday project update email for [Client Name].

This week: [tasks completed from Notion]
Next: [next milestone and date]
Any decisions needed: [blockers field — if empty, say 'None —
we're on track']

Tone: Confident, brief, reassuring. Like a founder who's on top
of it. They should feel informed, not overwhelmed.
Max 120 words. No bullet points. Sign as [Your Name]."

Step 3: Gmail
Send from your actual email address to client
What this replaces: Writing 10 individual update emails on Friday afternoon after a full week. Each one taking 10-15 minutes because you have to remember where each project is.
Milestone emails (event-triggered, not scheduled):
Beyond weekly updates, trigger milestone emails from Notion status changes:
Trigger: Notion project status changes to "First Draft Ready"

AI Prompt: "Write an email to [Client Name] telling them their
first [deliverable type] draft is ready for review. Include:
link to the Notion review page, what you'd like feedback on,
and a 3-day review window. Excited but professional. Max 100 words."
Trigger: Notion project status changes to "Revisions Complete"

AI Prompt: "Write an email telling [Client Name] that we've
incorporated all their feedback. Include: what changed based
on their input, next step, expected delivery date. Max 80 words."
Trigger: Notion project status changes to "Project Complete"

AI Prompt: "Write a project completion email to [Client Name].
Include: what was delivered, link to final files in Drive,
invoice link for final payment [Stripe link], and a genuine
thank you that doesn't sound like a template.
Mention the outcome we set out to achieve. Max 120 words."
You change one field in Notion. The email writes itself and sends.
Layer 5: The Kickoff Call Briefing Packet (AI-Generated)
This isn't a workflow — it's an AI prompt you run once, 30 minutes before every kickoff call.
After the intake form is submitted and the Notion brief is generated, paste everything into this prompt:
You are preparing me for a client kickoff call.

CLIENT BRIEF:
[Paste the 200-word brief from Notion]

INTAKE FORM RESPONSES:
[Paste key answers from the Typeform submission]

Generate a kickoff call briefing that includes:

1. CONTEXT (2 sentences): Who they are and what we're building
2. THEIR GOAL: The specific outcome they want
3. RED FLAGS to clarify: Any vague or conflicting answers from intake
4. 5 QUESTIONS to ask on the call (things the intake form didn't answer)
5. QUICK WIN to mention: One early deliverable to get momentum
6. POTENTIAL SCOPE CREEP to watch for based on their answers
7. PERSONAL NOTE: One thing from their intake to reference
   personally (shows you read it carefully)

Output as a clean briefing document I can have open during the call.
Thirty minutes of prep turned into 5 minutes. You walk into every kickoff call looking like you've spent an hour reviewing their account — because AI did exactly that.
The Full Sequence: What the Client Experiences
Here's what a client sees from their side when this system is running:
T+0 minutes: Signs contract T+2 minutes: Receives contract confirmation email (personalized, warm) T+30 minutes: Receives Stripe invoice for deposit T+2 hours (after payment): Receives welcome email with next steps T+2 hours 5 minutes: Receives onboarding questionnaire link T+2 hours 10 minutes: Receives kickoff call scheduling link T+3 days (if form not submitted): Receives gentle reminder Day of kickoff: You arrive briefed, organized, with project workspace ready Every Friday: Receives project update email with status and next steps At each milestone: Receives milestone notification automatically
What they experience: a founder who is fast, organized, and communicates proactively. What you did: set up the system once and answered their intake form responses.
Tools and Cost
Minimum viable stack ($0/month):
DocuSign free tier (3 envelopes/month)
Stripe free (pay per transaction)
Typeform free (10 responses/month)
Google Drive (free)
Notion free
Zapier free (100 tasks/month)
Gmail
Total: $0/month — works for 1-3 clients/month
Recommended stack ($50-80/month):
PandaDoc Starter ($35/month): Unlimited contracts, payment collection, template variables
Typeform Basic ($29/month): Unlimited responses, conditional logic, file uploads
Zapier Starter ($29/month): Multi-step Zaps, enough tasks for 10 active clients
Make free tier: File organization and complex branching
Notion free or Plus ($10/month)
Stripe free
Total: $73-103/month — works for 5-20 clients/month
Full stack ($120-150/month at $20K+ MRR):
PandaDoc Business ($65/month): Analytics, approval workflows, CRM sync
Typeform Growth ($99/month): Branching, integrations, logic jumps
Zapier Professional ($73/month): Unlimited tasks
Total: $237/month — built for 20+ concurrent clients
The ROI:
5-7 hours saved per client × $100/hour value × 10 clients/year = $5,000-7,000/year in recovered time. Stack cost: $876/year at the recommended tier. Net gain: $4,124-6,124/year — minimum.
Common Mistakes Solo Founders Make
1. Using one intake form for all project types
A web design intake and a copywriting intake need completely different fields. Build one form per service type. Typeform's conditional logic means you can have one "master" form that branches based on service selected — but the branching matters.
2. Sending the kickoff link before payment is confirmed
You schedule a kickoff call. They cancel. They never paid. Three hours wasted. Payment confirmed → kickoff link sent. Always in that order. Automation enforces this consistently even when you'd manually be tempted to jump ahead.
3. Welcome emails that sound automated
"Hello [First Name], welcome to [Company Name]! Your onboarding process has begun." This is worse than a personal email you write yourself. Invest in a strong AI prompt with specific context about the project type. The AI-generated email should feel like it took you 15 minutes to write — not like a Mailchimp template.
4. Forgetting to turn off automated updates when projects pause
Client pauses the project for 3 weeks. Your weekly update automation keeps sending Friday emails with "no progress this week." Build a "Project Paused" status in Notion that suppresses the weekly update trigger.
5. No human checkpoint before live
Never let the system go fully dark. Build one internal Slack notification for yourself at each major step (contract signed, payment received, form submitted, kickoff scheduled). You don't take action — you just know it happened. Critical for catching anything that breaks.
6. Over-automating the relationship
Every communication in the delivery phase should feel human even when it's AI-assisted. The weekly update is AI-drafted, but run your eye over it before it sends for the first 30 days. You'll catch any tone mismatches fast. After 30 days, you'll trust the pattern.
When You've Outgrown This System
You'll know it's time to upgrade when:
You're onboarding 5+ clients simultaneously and the Zapier task volume starts hitting limits. Upgrade to Zapier Professional or migrate complex flows to Make.
You need a client portal. Right now, clients receive emails. At scale, they want a login where they can see project status, deliverables, and communication history in one place. Tools like Copilot ($39/month), Notion's sharing features, or Dock ($49/month) turn your Notion workspace into a client-facing portal.
You hire your first employee or contractor. Once someone else touches client onboarding, your automation needs team assignment logic — "when contract signed, assign to [contractor name] based on project type." Zapier handles this but you'll need to rebuild some flows.
You want to personalize at a deeper level. AI video tools like Synthesia or Loom's AI features let you generate a personalized video welcome message for each new client at scale. Genuinely impressive first impression for high-ticket services.
Your Implementation Plan
Day 1 (1 hour): Contracts
☐ Set up PandaDoc with your contract template
☐ Add template variables:
{{client_name}},{{project_type}},{{start_date}},{{deposit_amount}}☐ Connect PandaDoc → Zapier trigger
☐ Test: sign a contract yourself, verify Zapier fires
Day 2 (1 hour): Payment + Welcome
☐ Connect Stripe → Zapier trigger (payment received)
☐ Write welcome email AI prompt, test output
☐ Build Gmail action sending welcome email
☐ Add Calendly scheduling link to welcome email
☐ Test full sequence: sign contract → invoice → pay → welcome email
Day 3 (1 hour): Intake Form
☐ Build intake form in Typeform for your primary service type
☐ Include file upload fields, access fields, communication preference
☐ Connect Typeform → Zapier → Notion brief generator
☐ Connect Typeform → Make → Google Drive file organizer
☐ Test: submit form yourself, verify Notion brief is generated
Day 4 (1 hour): Status Updates
☐ Set up weekly Friday update Zap (pull from Notion → AI write → Gmail send)
☐ Set up milestone email triggers (status change in Notion → email)
☐ Add "Project Paused" status that suppresses weekly emails
☐ Test with a real project in Notion
Day 5 (30 min): Internal Monitoring
☐ Add Slack/Telegram notifications for each major trigger
☐ Build Notion "Active Clients" dashboard showing each client's current status
☐ Review full sequence end-to-end with a test client
Week 2:
☐ Onboard your next real client through the new system
☐ Spot-check every automated email before it sends (for the first 3 clients)
☐ Note anything that sounds off — refine the AI prompts
Month 2:
☐ All prompts calibrated to sound like you
☐ Estimate time saved vs. manual onboarding
☐ Build intake form for second service type
The Real Talk on Automated Onboarding
The best client relationships start fast and feel effortless. That "effortless" feeling isn't magic — it's preparation. When a client gets a personalized welcome email 2 minutes after signing, a kickoff call scheduled the same day, and a project update every Friday without asking — they feel like they hired someone exceptional.
The founder who manually cobbles together onboarding for each new client doesn't deliver worse results. They just deliver a worse first impression, take longer to get started, and spend 5-7 hours per client on admin that automation does in minutes.
Build this system once. It runs every time. Every client gets the same quality first experience regardless of whether you landed them on a slow Tuesday or a frantic Friday afternoon.
Your involvement from signed to live: one trigger and one kickoff call.
Everything in between handles itself.
That's it.


Comments (0)
Leave a Comment